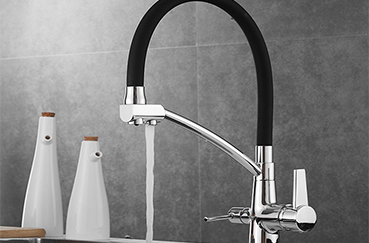
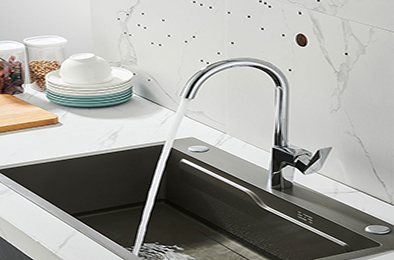
Brushed nickel faucets are popular for their modern, matte finish and resistance to fingerprints and water spots, but proper cleaning is essential to maintain their luster and prevent surface damage. This guide outlines step-by-step methods for effective cleaning, stain removal, and long-term maintenance, based on material science and industry best practices.
1. Understanding Brushed Nickel Finish
Brushed nickel is a electroplated finish consisting of a nickel layer bonded to a base metal (usually brass) via electrolysis. The "brushed" texture is created by mechanical abrasion, resulting in a non-reflective surface with fine, uniform scratches. Key properties include:
• Corrosion Resistance: Nickel’s natural oxide layer protects against rust, but prolonged exposure to acidic substances or abrasive materials can compromise this layer.
• Low Maintenance: The matte texture hides minor smudges, but regular cleaning is needed to remove mineral deposits and soap scum.
2. Essential Cleaning Tools & Products
Use gentle, non-damaging materials to avoid scratching or discoloring the finish:
|
Category |
Recommended Items |
Avoid |
|
Cleaners |
pH-neutral soap (dish soap diluted in water), specialized nickel cleaner (e.g., Weiman Metal Polish), white vinegar (for mineral deposits) |
Abrasive cleaners (Comet, Soft Scrub), citrus-based acids (lemon juice), bleach |
|
Tools |
Microfiber cloths, soft-bristle toothbrush, non-abrasive sponge |
Steel wool, scouring pads, rough paper towels |
|
Protective Gear |
Rubber gloves (for heavy-duty cleaning) |
N/A |
3. Step-by-Step Cleaning Process
3.1 Daily/Weekly Maintenance (Preventative Cleaning)
1. Rinse with Warm Water: After each use, flush the faucet with warm water to remove loose debris and mineral residues.
2. Wipe with Soft Cloth: Use a damp microfiber cloth to gently wipe the surface in the direction of the brush lines (usually vertical or horizontal), following the texture to avoid creating cross scratches.
3. Dry Thoroughly: Use a dry cloth to remove excess water, especially around joints and base plates, where standing water can lead to limescale buildup.
3.2 Deep Cleaning (Monthly or as Needed)
1. Prepare Mild Cleaning Solution:
• Mix 1–2 tablespoons of mild dish soap with 2 cups of warm water, or use a commercial nickel-specific cleaner.
• For stubborn mineral deposits, create a paste with equal parts baking soda and water, or use undiluted white vinegar (apply sparingly to avoid over-saturation).
2.Apply Cleaner:
• Dip a soft sponge or microfiber cloth into the solution and wring out excess liquid.
• Gently scrub the faucet, focusing on areas with soap scum or hard water stains (e.g., around the aerator, handle bases).
3. Detail Cleaning for Hard-to-Reach Areas:
• Use a soft-bristle toothbrush to clean crevices, threads, and the base of the faucet where grime accumulates.
• For stubborn limescale on the aerator, remove it (check manufacturer instructions) and soak in white vinegar for 30 minutes, then rinse and reattach.
4. Rinse and Dry:
• Thoroughly rinse with warm water to remove all soap residue, which can leave a dull film if left behind.
• Dry completely with a lint-free cloth to prevent water spots.
3.3 Stain Removal Techniques
|
Stain Type |
Cause |
Treatment Method |
|
Water Spots/Limescale |
Mineral buildup from hard water |
Apply white vinegar with a cloth, let sit for 5–10 minutes, then scrub gently with a soft brush. Repeat if necessary. |
|
Soap Scum |
Accumulation of fatty acids from soap |
Use a baking soda paste (1:1 ratio with water), scrub in circular motions, then rinse thoroughly. |
|
Oxidation/Discoloration |
Prolonged exposure to moisture or harsh chemicals |
Use a commercial nickel polish (check for "brushed finish safe" labels) applied with a soft cloth, following the brush lines. Wipe off excess polish to avoid residue. |
4. Maintenance Tips for Longevity
• Avoid Harsh Chemicals: Never use acidic cleaners (vinegar should be used sparingly and rinsed promptly), ammonia, or abrasive products, as they can etch the nickel layer and dull the finish.
• Regular Drying: Wipe down the faucet after each use in high-humidity environments to prevent water-induced discoloration.
• Inspect Seals and Aerators: Periodically check for leaks around O-rings and aerators, as dripping water can cause localized mineral buildup.
• Test New Products: Before using a new cleaner, test it on an inconspicuous area (e.g., the underside of the faucet) to ensure it does not damage the finish.
5. Common Mistakes to Avoid
• Using Abrasive Tools: Steel wool or scouring pads will scratch the brushed surface, creating permanent dull marks.
• Overusing Vinegar: While effective for limescale, excessive vinegar exposure can degrade the protective oxide layer over time.
• Ignoring Manufacturer Guidelines: Always refer to the faucet’s care manual, as some brands may have specific recommendations for their finishes (e.g., Moen, Delta, or Kohler instructions may vary slightly).
6. Scientific Basis for Cleaning Methods
The brushed nickel finish relies on a uniform surface texture to maintain its appearance. Mechanical cleaning in the direction of the brush lines prevents cross-scratching, which would create a patchy look. pH-neutral cleaners are used to avoid disrupting the nickel oxide layer, while acidic solutions (in limited use) dissolve calcium and magnesium deposits without excessive corrosion. Proper drying minimizes electrochemical reactions between water minerals and the metal surface, reducing the risk of pitting or staining.
Conclusion
Maintaining brushed nickel faucets requires consistent, gentle care to preserve their aesthetic and functional integrity. By following these steps—using appropriate cleaners, respecting the finish’s texture, and avoiding harsh chemicals - homeowners can enjoy a long-lasting, elegant look while avoiding damage. Regular cleaning and maintenance is key to ensuring your kitchen faucets and basin taps remain durable and beautiful.