Replacing a faucet handle is a relatively straightforward DIY task that can save you money and give your faucet a new look or fix a malfunctioning handle. Here is a step-by-step guide on how to do it:

1. Gather the Necessary Tools and Materials
A screwdriver: This is the most common tool you'll need as most faucet handles are secured with screws. The type of screwdriver may vary depending on the screw head, such as a flathead or Phillips.
An adjustable wrench: In case you need to loosen or tighten nuts or bolts that hold the handle or other components in place.
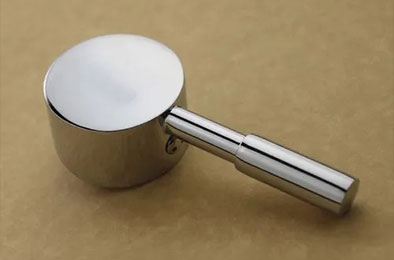
Replacement faucet handle: Make sure you have the correct handle that matches your faucet's make and model. You can usually find this information on the faucet itself or in the product documentation. If you're unsure, take a photo of the old handle and bring it to a hardware store for assistance.
Plumber's tape: This is useful if you need to reseal any connections or threads during the process.
2. Turn off the Water Supply
Locate the shut-off valves under the sink. There are usually two valves, one for hot water and one for cold water. Turn both valves clockwise until they are completely closed. This will stop the water flow to the faucet and prevent any accidental spills or leaks during the replacement process.
To ensure the water is truly off, turn on the faucet and let any remaining water drain out.
3. Remove the Old Faucet Handle
Inspect the handle to see how it is attached. Most handles have a visible screw on the top or side. Use the appropriate screwdriver to remove this screw. If the screw is corroded or difficult to turn, you may need to apply some penetrating oil and let it sit for a few minutes before attempting to remove it.
Once the screw is removed, gently pull or wiggle the handle to detach it from the faucet stem. In some cases, there may be a decorative cap or cover over the screw. Pry this off carefully using a flathead screwdriver or a small knife.
If the handle is stuck, there may be mineral deposits or corrosion holding it in place. Try spraying some WD-40 or a similar lubricant around the base of the handle and let it sit for a while before trying to remove it again.
4. Examine the Faucet Stem and Related Components
Inspect the O-rings or gaskets around the stem. If they are worn, cracked, or damaged, remove them and replace them with new ones. These small parts are crucial for preventing leaks.
5. Install the New Faucet Handle
Before installing the new handle, clean the faucet stem and any surrounding areas to remove any dirt, debris, or old sealant.
Place the new handle over the faucet stem and align the screw holes. Insert the screw and tighten it using the screwdriver. Make sure not to overtighten as this could damage the handle or the stem.
If the new handle comes with any additional parts, such as a decorative cap or a tightening nut, install them according to the manufacturer's instructions.
6. Turn on the Water Supply and Test
Test the handle's functionality by turning it to control the water flow and temperature. Make sure it operates smoothly and that the water flow is as expected.
By following these steps, you can successfully replace a faucet handle and keep your faucet in good working order. If you encounter any difficulties or are unsure about any part of the process, it may be advisable to consult a professional plumber.


